Cyclist
Watch: How to stop disc brake rub: Pro tips to avoid nasty scrapes and squeals
Disc brakes are one of the best technologies to emerge in cycling in the past decade (sorry, not sorry). But one thing that always drives us mad is that rubbing noise you hear on so many bikes.
Given that it’s both annoying and inefficient, we’re going to show you how to make sure your brakes are set up perfectly in order to keep your bike nice and quiet.
How to stop disc brake rub step by step
- Diagnosing different forms of disc brake rub
- Push back the pistons
- Align the brake calliper
- Quick and dirty tips
- Check the brake is working correctly
- Diagnosing a bent disc rotor
- How to straighten a bent rotor
- Final inspection
Tools required
- Piston press – Buy now from Amazon (£21.23)
- Allen or torx key – Buy now from Tredz (£8.95)
- Rotor truing tool – Buy now from Tredz (£20.99)
1. Diagnosing different forms of disc brake rub
That infuriating disc rub is going to be caused by one of two things: either a poorly aligned calliper or a rotor that isn’t dead straight.
Let’s start with the calliper alignment. It’s quite difficult to see how a calliper should be aligned on the bike due to the small size of the components involved. For that reason, we’ve produced the sketch below to help explain.

This silver piece in the middle is the brake rotor. The dark area around the edge is the body of the calliper. Inside this are the pistons, while the shorter silver areas are your brake pads. This is a basic representation of a perfect scenario. You’ve got the rotor correctly aligned in the space between the calliper body, not just aligned within the pads themselves.
Your start point should always be to get that rotor central in the calliper body. With the pistons retracted all the way and the pads in place, this is what your disc brake should look like.
2. Push back the pistons

Assuming you’re working on a hydraulic brake, the first thing to do is ensure the pistons are retracted back into the calliper. To do this, pop the wheel and the attached disc rotor out. This makes it easier to see what’s going on with the pads and piston placement inside the calliper.
You’re aiming to start from a situation where the pistons are pressed fully back into the calliper. This is the ideal reset or start point. It’s possible to force the pistons back with the pads in place. However, be careful regarding the tool you use to jimmy the pads apart, as a screwdriver can damage their material. The best option is a tool designed specifically for the job, often called a ‘piston lever’ or a ‘piston press’.
Pop this between the pads and give it a little wiggle from side to side. You should feel the pistons retract back into the body of the calliper. Once the pistons are fully retracted, you’re ready to refit your wheel.
3. Align the brake calliper

With your pads reset, you’re now prepared to set the calliper placement. Manoeuvre the bike so you can look through the calliper. Think back to the sketch of the perfectly aligned calliper. You want the rotor to be dead centre in the calliper body. To achieve this, slightly loosen the screws holding the calliper to the frame or fork so that the calliper is free to move.
Use your hands to push and pull the calliper until it perfectly aligns with the disc rotor. A light background is beneficial at this point as it will allow you to see the gaps more clearly. With the pads pushed back, there should be daylight on either side of the rotor. Tighten the bolts to the recommended torque and check that you haven’t inadvertently shifted the calliper in doing so. Your calliper should now be perfectly aligned.
4. Quick and dirty tips

One fast and dirty alternative to this method is to simply loosen the calliper bolts, pull the brake lever, and hope that the action of the brake centralises the calliper. In theory, you should then be able to simply tighten the bolts and lock the calliper into the correct position. Although this works most of the time, visually aligning the calliper yourself is a much surer bet to determine everything is spot on.
We don’t recommend relying on the brake to centre itself because this method depends on the pistons coming out cleanly and evenly. However, with the addition of a bit of dirt or wear, this doesn’t always happen. This can cause the pads to go off centre, resulting in one hitting the rotor before the other and creating fresh rubbing issues.
However, if you’re still struggling to perfect the alignment, we have an additional trick up our sleeves. For this, you’ll need a business card or similar. You’re looking for something around half a millimetre or less that you can fold around either side of the rotor.
Remove the wheel and place the folded card over the rotor. Now refit the wheel with the card between the rotor and the brake pads. This will give you a definite space on either side of the rotor. Tighten the brake and remove the card. The brake should now be perfectly aligned.
5. Check the brake is working correctly

At this point, you should be happy that you’ve correctly aligned the calliper. You now want to observe the action of the brake as you pull the lever for the first time. As you pull the lever, you want to see the piston and brake pads coming out and retracting equally. Again, you’re looking for a bit of daylight on either side of the rotor between it and the pads.
One thing to check for is any potential problems with the pistons. A sticky piston will tend to come out and then not retract fully. If this is the case, the brake will require further remedial work.
6. Diagnosing a bent disc rotor

That’s the calliper side of things covered. However, there are still several things that could create unwanted noise. A classic of the genre is the repetitive tick, tick, tick. Generally, this isn’t the result of poor calliper alignment. Instead, its cause is the rotor itself not being straight.
When we say a rotor is bent, we’re not talking about a visually obvious bend that might have resulted from an impact. Instead, we’re talking about slight deviations from true, which can happen through repeated heating and cooling. This sort of bend is characterised by rhythmical rubbing on every rotation of the rotor, and fixing it is no more tricky than just bending it back and forth.
7. How to straighten a bent rotor
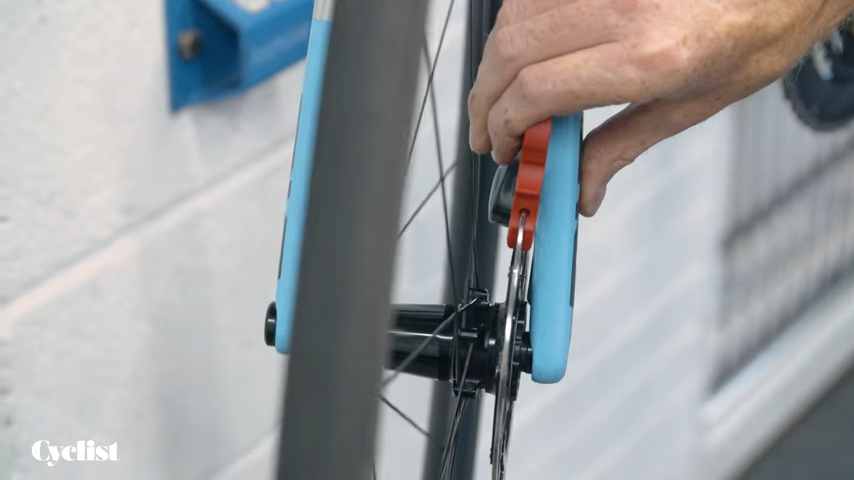
There are a couple of useful tools on the market for this job. These feature a slot that goes over the top of the rotor to provide additional leverage to push and pull it. It’s also often possible to simply use your hands.
Regardless of what you employ, you’ll first need to work out where the rotor is rubbing. For this, you’ll require your eyes and ears. Slowly spin the wheel and listen for where the rubbing is coming from. Once you’ve located where this is, stop the wheel as close as possible. Next, take a look to determine on which side the rotor is rubbing. Because you’ve already aligned the calliper, you’ll be able to clearly determine whether the rotor is hitting the inside or outside pad.
Make a note of where this is on the rotor, then rotate the wheel to access this section. Gently pull the rotor in the desired direction using either a tool or your hands. Different rotors will be more or less robust, so don’t go crazy. It doesn’t require a lot of force. Make small adjustments, then rotate the rotor to check the effect they’re having. Your rotor may need adjusting in more than one location.
8. Final inspection

You should soon be able to rotate the wheel without hearing anything rubbing. To check everything is ready to go, pull the lever a few times to ensure the pads are retracting properly and there is still no unwanted contact. If everything is working correctly, your brake should now be beautifully silent.
More: How to true a bike wheel
The post Watch: How to stop disc brake rub: Pro tips to avoid nasty scrapes and squeals appeared first on Cyclist.